Showing posts with label STEM. Show all posts

Saturday, September 2, 2017

Extended LEGO Club with Maker Fun

The Standard
The library had an extremely popular weekly LEGO Club for kids 5 to 12 (we have extra large building bricks in the children's room out all the time for younger kids). There was a large assortment of regular pieces, boards, minifigures, and a ton of random little accessories. People might tell you that you should steer away from sets and kits and stick to the plain pieces, but it's not true. The kids love the little flames, swords, flowers, and all kinds of bits that they use to create mini kingdoms and scenes. My supervisor use to go to a LEGO store that had a fill-a-bag section and would just add all kinds of things. As our minifigures walked out over the course of the years I was there (especially the female minifigures), I budgeted in two sets from LEGO Education- this community set and a fantasy one. I found these sets to be the best price for the largest number of figures. I also added a bunch of 10X10 plates, the kids liked to add them together to expand and we had a limited number, these I just got from Amazon. When the kids came in they'd choose their plates and minifigures, which were carefully rationed before we got the new sets. Then they'd find a spot around a table set with gladware bowls full of regular pieces and large plates heaped with accessories, for easier digging. Anything in a bowl or plate is fair game, if it's on the table in front of someone it's  been spoken for and you have to ask if they will trade. At the end we put each child's creation in our lighted display case for the week with a post-it or card with their name on it. They love showing their parents and friends throughout the week.
With very few exceptions, I didn't set themes or parameters for the kids, they all had different interests and things they wanted to build and I felt it was important for them to have some unrestrained creative time. This social media ad shows a couple incredible dynamic scenes the kids came up with one week:
I sometimes had teen volunteers help me with LEGO club and while it was under my main umbrella focus, part time employees tended to run it most of the time after I'd been there a few months. A few hours before the program time I'd take the creations out of the display and take them apart, separating out the regular pieces from the accessories and the minifigures. I once took apart a small constructed box in a scene, when I opened it there was a disembodied minifigure head with a small red single cap piece on the neck, I have no idea which kid made it, but it's one of my top ten LEGO club memories. 

Extended Version
When LEGO club falls during a school vacation or an early dismissal we would extend it to two hours and add some maker activities. LEGOs were still the most popular by far but we managed to get some to expand. Here are some of the other stations:

LEGO Catapults-
These were my first addition. I will admit I held the minifigures hostage to encourage the kids to try something new, if you wanted a guy you had to at least try to make it fly. There were to approaches to making them, one was a simple lever on an wheely base, and the other involved small rubber bands and was a bit harder to make work. I covered a table in paper to let us track and measure their efforts. 

Geodesic Building
This one became extremely popular and a regular fixture of Extended LEGO club. I added it because kids + snacks is a no-brainer. It's pretty simple: edible joints connect toothpicks to make pyramids, towers, and domes. The first time I used hard gummy pumpkins, because it was Thanksgiving. These worked well but were heavy and not very tasty. We also used grapes, which worked the best and healthy, but were expensive. We tried cheese sticks broken up into cubes, they didn't work at all, they got too soft too quickly. In the end, our tried and true choice was mini marshmallows. They're very cheap and work perfectly. Each child gets a plate, a pile of toothpicks (around 25), and about a 1/3 cup of marshmallows. They're welcome to eat their building materials, but they have to build at least one thing first. 
k'nex
Someone donated a huge box of these next-level building toys to the library. We set them out and just let the kids do whatever they want. They're a bit harder to put together than LEGOs and take some more patience. They like that they can make creations that move and we also have two motors that take a lot of trial-and-error to make work but are popular too. 


Monday, May 22, 2017

3D Design and Printing: a New Chess Set

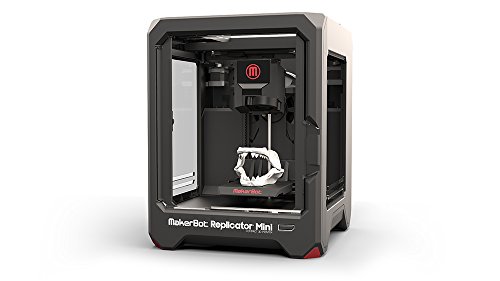
Image result for makerbot miniMy undergraduate degree is in theater design, so I actually have training in CAD, including a quarter spent learning 3DViz, a professional 3D program that architects used at the time I learned it, which was not that recently. I find it really exciting that I get to pull from that knowledge now in teaching kids 3D printing on the junior version by the same company, Tinkercad. The library system had one small Makerbot Mini that had been given to us by a grant from a local company, specifically for kids programs. Embracing our library's 3D printer was one of the things that helped me get noticed and move rapidly from part time to full time. Traditionally the elementary services librarian at my library has been the one in charge of the 3D printer and having tech classes for kids, so I knew I needed to have something great as one of my first few months of programs in that position. Previously the library had done intro classes that consisted of designing a cup and more complicated ones creating a lamp. The intro classes I ran at my branch were the basics involved in designing a house or castle. With a robust chess club as another of my main regular duties I was inspired to have the kids work together in designing a new chess set.

Rather than just make this a Tinkercad how-to I decided to really teach them about the stages of design. I booked our tech classroom and registered kids, 9 total, with a caregiver, ages 5 to 12. I called everyone two days before, got across-the-board assurances they would come and then ended up with six kids. This is why I hate registration for programs. Anyways, six was a great number. The program was 90 minutes and I broke it up into several phases: Research, Brainstorm, Design, and Re-design.

Research
I started by showing them some images of ancient chess sets, the current standard set (called the Staunton chess set) and the images from Elgin marbles and architecture in London that inspired its designer in the 1800's in London. I talked about how the designer was inspired by his city. Then we took a look at some of the far-out designs for chess sets on Thingiverse.

Brainstorm
We brainstormed different visual themes for our board. Animals, fruits and tv characters made the board. I talked about the steps it takes to design complex pieces and suggested we try something a little more simple since it was most students' first attempts with Tinkercad. Since New Haven is known as Elm City and the town green is in front of the library I suggested trees as a theme. We then brainstormed some more for what each piece could be in our theme finally settling on:
Pawn- leaf
Rook- Tree Stump
Knight- Squirrel
Bishop- Christmas Tree
Queen- Birch Tree
King- Oak Tree

Design
Finally it was time to crack open Tinkercad. I showed them the basics. We divvied up the pieces, see, 6 was perfect! The kids went back to the research phase individually and looked at some pictures to help them come up with their design.Their designs were about as diverse as their age range. My plan had always been to tweak what they came up with to get our end set. 3/4s of the designs needed very few changes, two kids obviously sort of missed the boat on the concept. Many of the kids were incredibly creative, my favorite is the squirrel knight which has a 6 for a tail! Here are their designs:


Re-Design
We talked about how you don't just come up with one idea in design, toss the pieces on the workplane and it's perfect. Instead you come up with the idea and try and try and try until you find the pieces that work together best. I used my nametag as an example (it's a frame that the paper nametag that goes into our regular lanyard covers fits into), it took me several tries to get the owl right, I scrapped whole completed designs for it. We also talked about how the Makerbot Mini was created as a prototype machine, as it only uses a brittle plastic filament rather than making things out of hardier materials like metal. It's meant to test out ideas that you would then manufacture somewhere else.
I completed the main re-design of course, on my own over the next few weeks. I borrowed from Thingiverse for the rook and the king, mostly using a stump I found wholly designed for the rook but just using a more intricate oak leaf that I incorporated into a larger design for the king. I used the height for standard pieces from the chess entry on Wikipedia, even though this would never be a tournament set. I used the child's squirrel knight design with only the change of making it stand up to mimic the posture of the classic knight.
Here's the finished set, I'm pretty proud of it and the kids should be too:

Dinovember!

Inspired by the mischievous dinosaurs that visit the Tuma family in Novemeber, I threw a celebration of all things dinosaur. We made foam dinosaur foot covers, hatched dinosaur eggs, had a dinosaur count contest, and learned about how fossils are created with yummy pudding parfaits. This was my priciest program of the fall, about $60. We are fortunate to be down the street from the Yale Peabody Museum of Natural History and this was the first time we took advantage of their Peabody on the Road program. They sent two volunteer docents and two large tables-worth of hands-on exhibits from the museum. Every time I was able to sneak into the main room where they were set up the table was packed. They have four kits to choose between and had just debuted the perfect one for my program: the evolution of birds into dinosaurs.


In our program room I had four activities for the kids:

Hatching Dinosaur Eggs
I got a bag of small plastic dinosaurs from Amazon and made about 30 eggs. After much inner debate about sand-coffe-ground-etc... and all of the many recipes I found on Pinterest, I went with a simple baking soda and water recipe. I can't find my notes for the ratio I ended up with, I think it was something like 2 cups of water to 1 1/3 cups of baking soda, but I tested it at home and it was different at work. I got two five-pound bags of baking soda at Target but I only used one. You just mix them together until you get a moldable consistency. I added some green food coloring to the water but it didn't come through strongly in the final eggs. The ones I made at home hardened nicely over about three days. The ones at work (where the heat is stronger and dryer) flaked as they hardened, which made them look scaly. The kids then used toy hammers and eye droppers with vinegar to break them apart and reveal the dinosaurs inside. This was messy but really fun.

Dino-feet
I got a big pack of colored foam from Michael's and made a couple of laminated templates. We bought some tiara and pirate hat kits from Oriental Trading in October and they have provided a huge wealth of stick-on foam shapes from jewels to geometric shapes to letters. The big trick to these I only figured out from viewing a number of blogs about making them is to have the back part of the dinofoot go under the shoe, many showed these as being pulled up so it was kind of a like a huge anklet but it's hard to get a hole that will go over a shoe. The template is pretty easy but you can find a printable one here
Fossil Dig
What's a big party without a snack? These are basically dirt cups with pudding and crushed graham cracker pieces (both chocolate and regular) and a few dino gummies (again from Amazon). I had a printout that talked about how sediment forms on top of dinosaur remains to make fossils. After much math and consternation in the pudding aisle of the grocery store I realized that the single-serve snack packs were cheaper than making up a bunch of the cold instant stuff, also worked better labor-wise and to accommodate whatever level of attendance we have (always hard to gauge at my library).
Dinosaurs on the brain
The last station was just a simple game. I have a glass head I bought from Pier One Imports a few years ago (something like $15 on sale) to hold my pro headphones I use for audiobook work (if they don't stay stretched they pinch my head). I've used it a few times at the library, for a how-many-LEGOS challenge and for a mad science display. It's nice because even smarty kids or parents who try to game the guessing game can't really work with the distortion provided by the glass. I put a bunch of medium sized vinyl dinosaurs from a story time kit inside along with my leftover small plastic ones, I think it ended up being 36. I had two kids guess the right number and they got a book that had been donated to the library about dinosaurs and a little glowing plastic fossil puzzle from the dollar tree.


Here's a link to a pdf of the signs for each station (except the dino-feet, it was pretty self-explanatory)